OPEN SESAME!
was probably not the first password. Regardless, passwords have most likely been around for all of recorded history. They’re super important too, protecting everything from our email to Fort Knox! As their use goes up, especially with computing, protecting the password itself is almost as important as protecting the thing the password is protecting. To this end, the industry has seemingly settled on super secure and locked down password vaults, that can be a single place for all your passwords, allowing tight controls around who, or what, can retrieve them.
In this article, we’ll take a look at how to integrate Ansible Tower with a CyberArk password vault, for the purposes of retrieving passwords for credentials when needed for job execution.
Buy Why? Well, one of the big reasons to having a password vault is to limit the number of places a password is stored. Fewer locations equal fewer attack vectors. Ansible Tower credential objects store username/password pairs for credentials used in playbooks. Any time a job needs to connect to a machine, or an API, it uses a credential to do so. By removing the actual password or secret from the Ansible Tower database and replacing it with lookup instructions, we remove Ansible as a potential security hole, while also not reducing functionality or requiring any major rewrite to any of the playbooks or other assets.
So how do we do it?
Creating the Lookup Credential
The first step is to create the lookup credential in Ansible Tower. This credential is what makes the connection to CyberArk. In CyberArk, the administrator is creating an application ID to grant the necessary access. Think of that like a user account for an application, in this case, for Ansible Tower. While only one of these is typically needed to perform account lookups, you may end up with more than one, depending on how you want to organize access to various accounts or safes.
Note: If you are not the CyberArk administrator for your environment, you’ll need to get with them to help set this up. This will require information sharing between both teams / products for the initial configuration. Also Note: Most of the screenshots here came from a production corporate environment. Given that, many of the images will be redacted like a congressional memo. The general configuration workflow and necessary steps should still be adequately described, however.
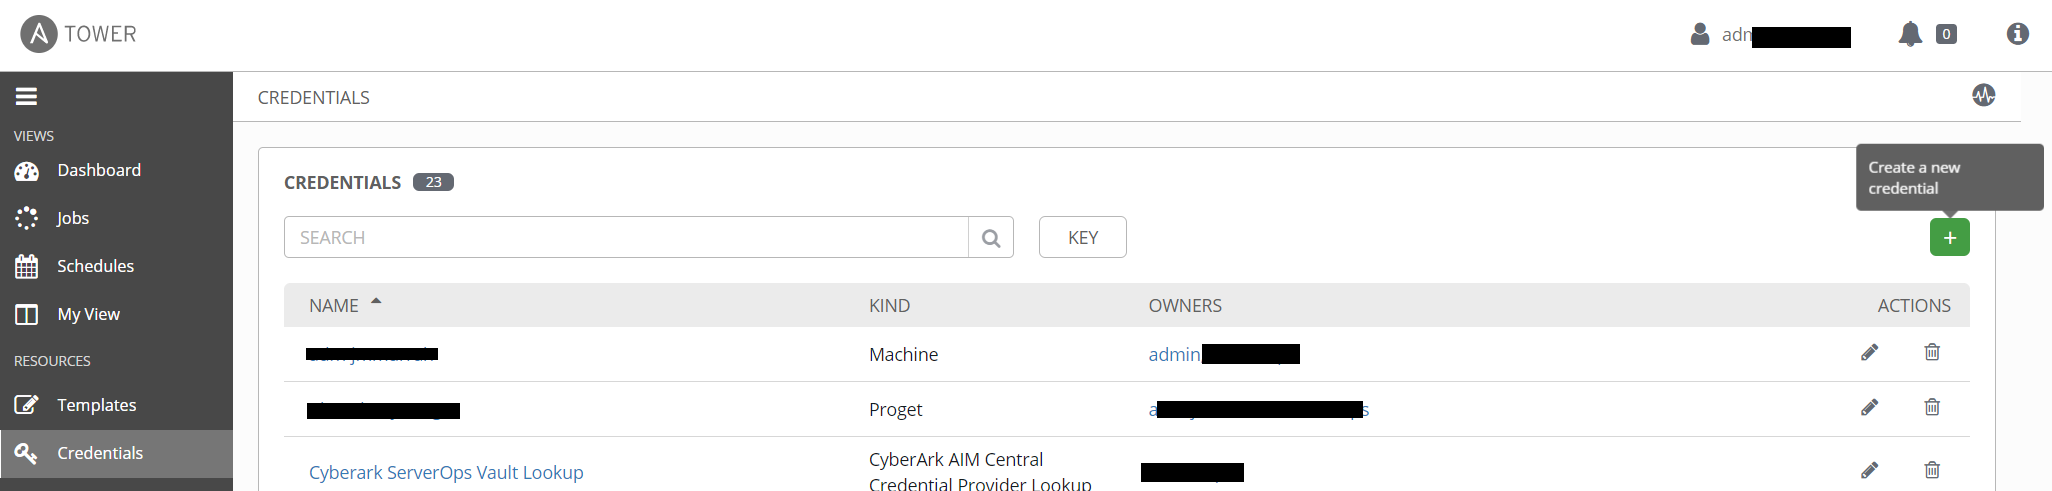
Navigate to the CREDENTIALS section in Tower, and click the green + sign.
From the new credential page, give your credential a recognizable name, and select CyberArk AIM Central Credential Provider Lookup from the CREDENTIAL TYPE selection field.
Note: CyberArk has since renamed Application Identity Manager (AIM) to Application Access Manager (AAM). While the Tower configuration uses the former name, all functionality is otherwise identical.
Depending on how the permissions are organized within your CyberArk implementation, you may want to include the vault or team name in the NAME field. You can also use the DESCRIPTION field to list the CyberArk vaults the account has access to.
Once the credential type has been selected, additional fields will appear.
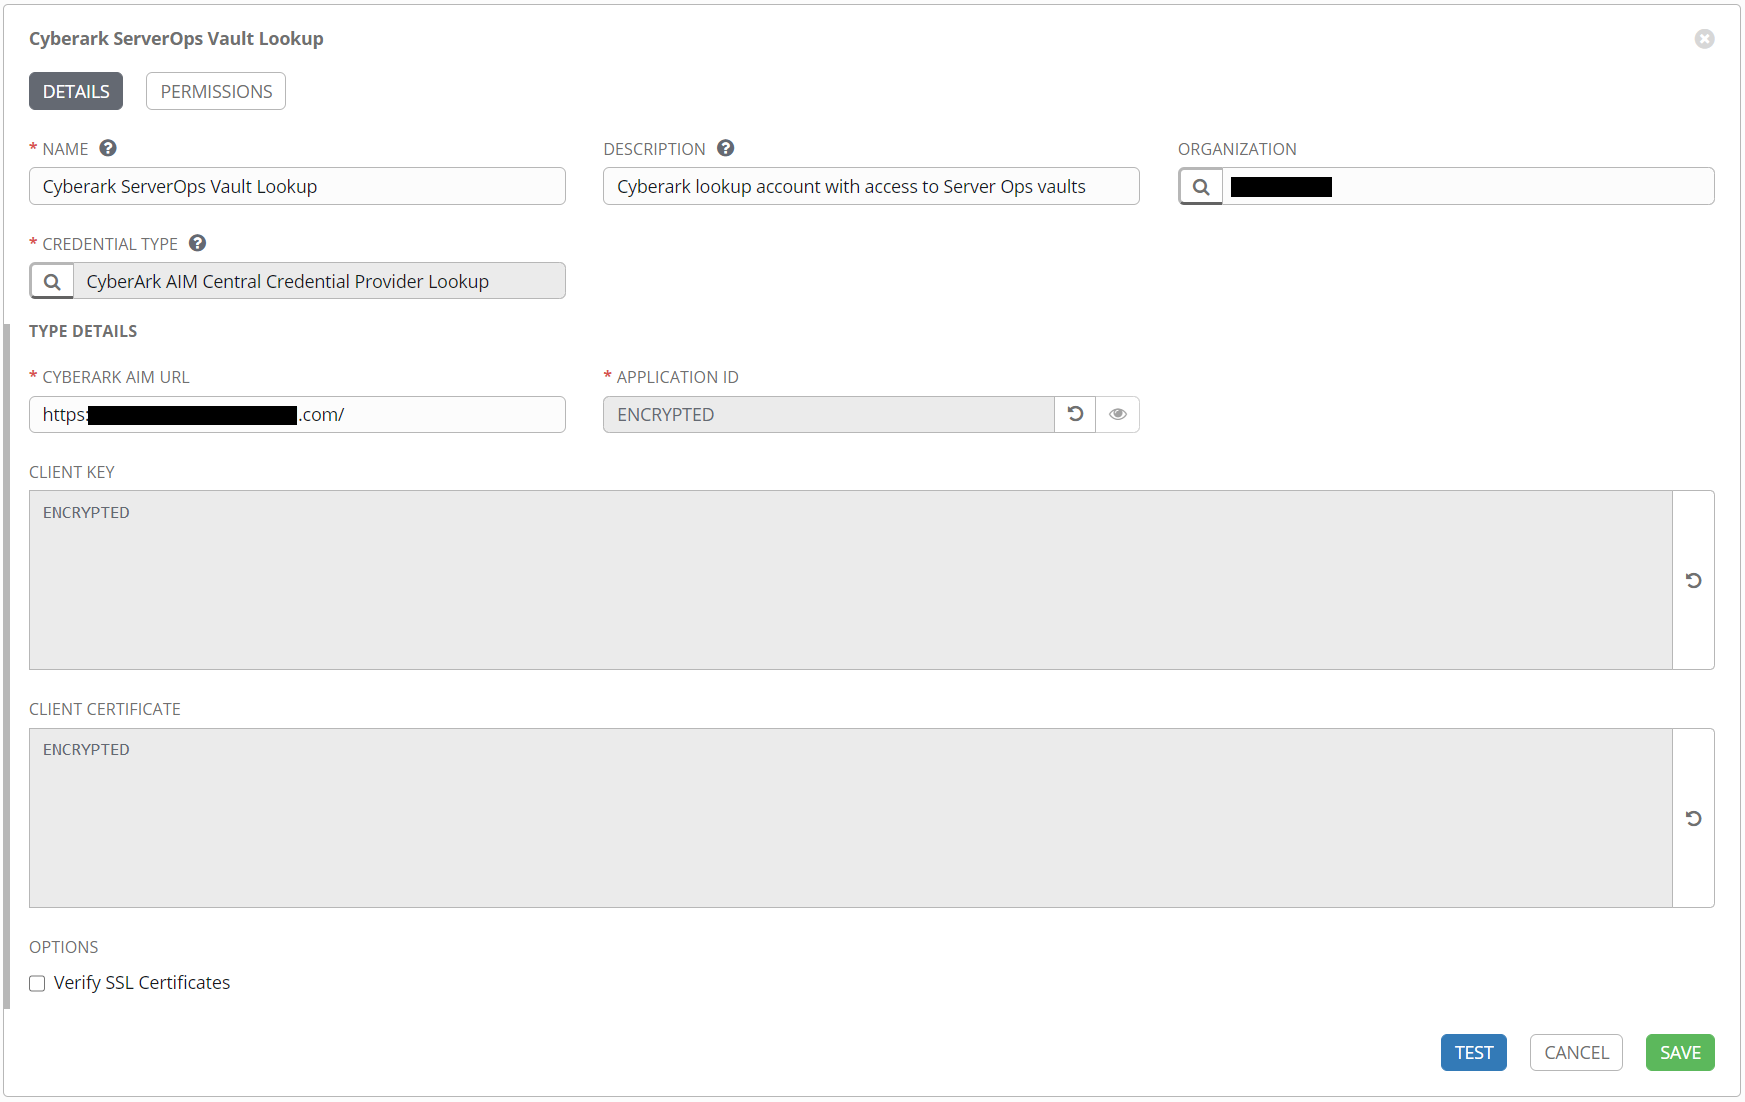
The CyberArk AIM URL should be the URL used to access your CyberArk web interface.
The APPLICATION ID is a unique value provided by the CyberArk administrator when access is granted.
The CLIENT KEY and CLIENT CERTIFICATE fields provide secure authentication for the given application. Once a certificate is created and added to this credential object, the serial number must be provided to the CyberArk administrator to secure access. They may also chose to restrict access by IP address or other means.
The next section will detail the certificate creation process. For now the fields can be left blank and the credential object can be saved.
Requesting a Client Certificate
A client authentication certificate is slightly different in use than a web server certificate, but similar in creation.
Note: Most of this section assumes you are operating in an environment with an Active Directory integrated Windows Certificate Services infrastructure. If this is not the case in your environment, you may have to modify these steps. The important takeaway is that you create a certificate for client authentication. Depending on your CyberArk administrator’s policies, a self-signed certificate may also be sufficient.
First a certificate signing request (CSR) is created, then submitted for signing to a certificate authority. The following command can be run from any Windows machine. Note the subject name in the example is a generic value, and should be changed to something more specific. Unlike a web server certificate, the subject name is not validated, so it doesn’t need to represent a URL or anything specific.
# this subject name is a generic value, and should be changed to something
# more unique, perhaps including the team name or vault name
$subjectname = 'CN=AnsibleTowerCyberArk'
# this certificate type must be issued to a computer account, so the command
# must be run with an account that has admin rights to the machine.
get-certificate -Template ClientAuthCert -subjectname $subjectname -CertStoreLocation cert:\LocalMachine\my
This will generate a request to be issued by your Certificate Authority administrators, or may be automatically issued depending on your configuration. You can view the pending request with this command.
get-childitem cert:\LocalMachine\REQUEST\
Once the certificate has been approved, this command can be used to retrieve and enroll the certificate.
$request = get-childitem cert:\LocalMachine\REQUEST\
$enrollresult = get-certificate -Request $request
$enrollresult | format-list *
The above output should look something like this:
Status      : Issued
Certificate : [Subject]
                CN=AnsibleTowerCyberArk

              [Issuer]
                CN=SUBCA01, DC=domain, DC=com

              [Serial Number]
                78000207BD5E78F4825DAF391D0003000207BD

              [Not Before]
                6/30/2020 10:38:59 AM

              [Not After]
                6/29/2025 10:38:59 AM

              [Thumbprint]
                2AE5183D5F1969DAE9648087FF355F5D6C0435DE
The certificate should also be listed in the local machine store.
get-childitem cert:\LocalMachine\My
Take note of the [Serial Number] and [Thumbprint] values above, those will be needed later. The [Serial Number] value will be needed by the CyberArk administrator when securing access to the safes.
Once issued you will need to use the OpenSSL utility to retrieve the data in a format Tower can use. This is available on most linux distributions, or can be downloaded and installed on Windows from here.
The first step is to export the certificate to a PFX file, which will include both the private and public keys.
WARNING - The files used from this point on are extremely sensitive. Think of them as plain text passwords that cannot be changed. Once this operation is complete and the certificate has been loaded into the Tower credential object, all files should be deleted.
$PFXpassword =  read-host -AsSecureString -Prompt "enter PFX password"
$cert | Export-PFXCertificate -Password $PFXpassword -FilePath .\DELETEME.PFX
Copy the PFX file as needed, or install OpenSSL for Windows. OpenSSL for Windows will likely install in this path: “c:\program files\OpenSSL-win64\bin\OpenSSL.exe” The following commands will export the necessary info. Note that each will prompt for the password created when the PFX file was exported.
"c:\program files\OpenSSL-win64\bin\OpenSSL.exe" pkcs12 -in DELETEME.PFX -nocerts -out DELETEME.key -nodes

"c:\program files\OpenSSL-win64\bin\OpenSSL.exe" pkcs12 -in DELETEME.PFX -nokeys -out DELETEME.pem -nodes -clcerts
The files should be viewable in a text editor like notepad, and may have some header information. Anything before the line -----BEGIN CERTIFICATE----- or -----BEGIN PRIVATE KEY----- can be deleted.
Updating the Tower Credential
Now that the certificate is issued and in the correct format, it can be added to the credential object in Tower. Log in to Tower, navigate to the credentials section, and edit the previously created credential object. if the CLIENT KEY and CLIENT CERTIFICATE fields have the word ENCRYPTED in them, click on the replace button on the far right of the field (looks like a curly arrow). Paste the data from the .key file into the CLIENT KEY field, and the contents of the .pem file into the CLIENT CERTIFICATE field. If you deleted the header data above, you can also drag and drop the file onto the fields. The important thing is that -----BEGIN CERTIFICATE----- or -----BEGIN PRIVATE KEY----- are the first lines of each field.
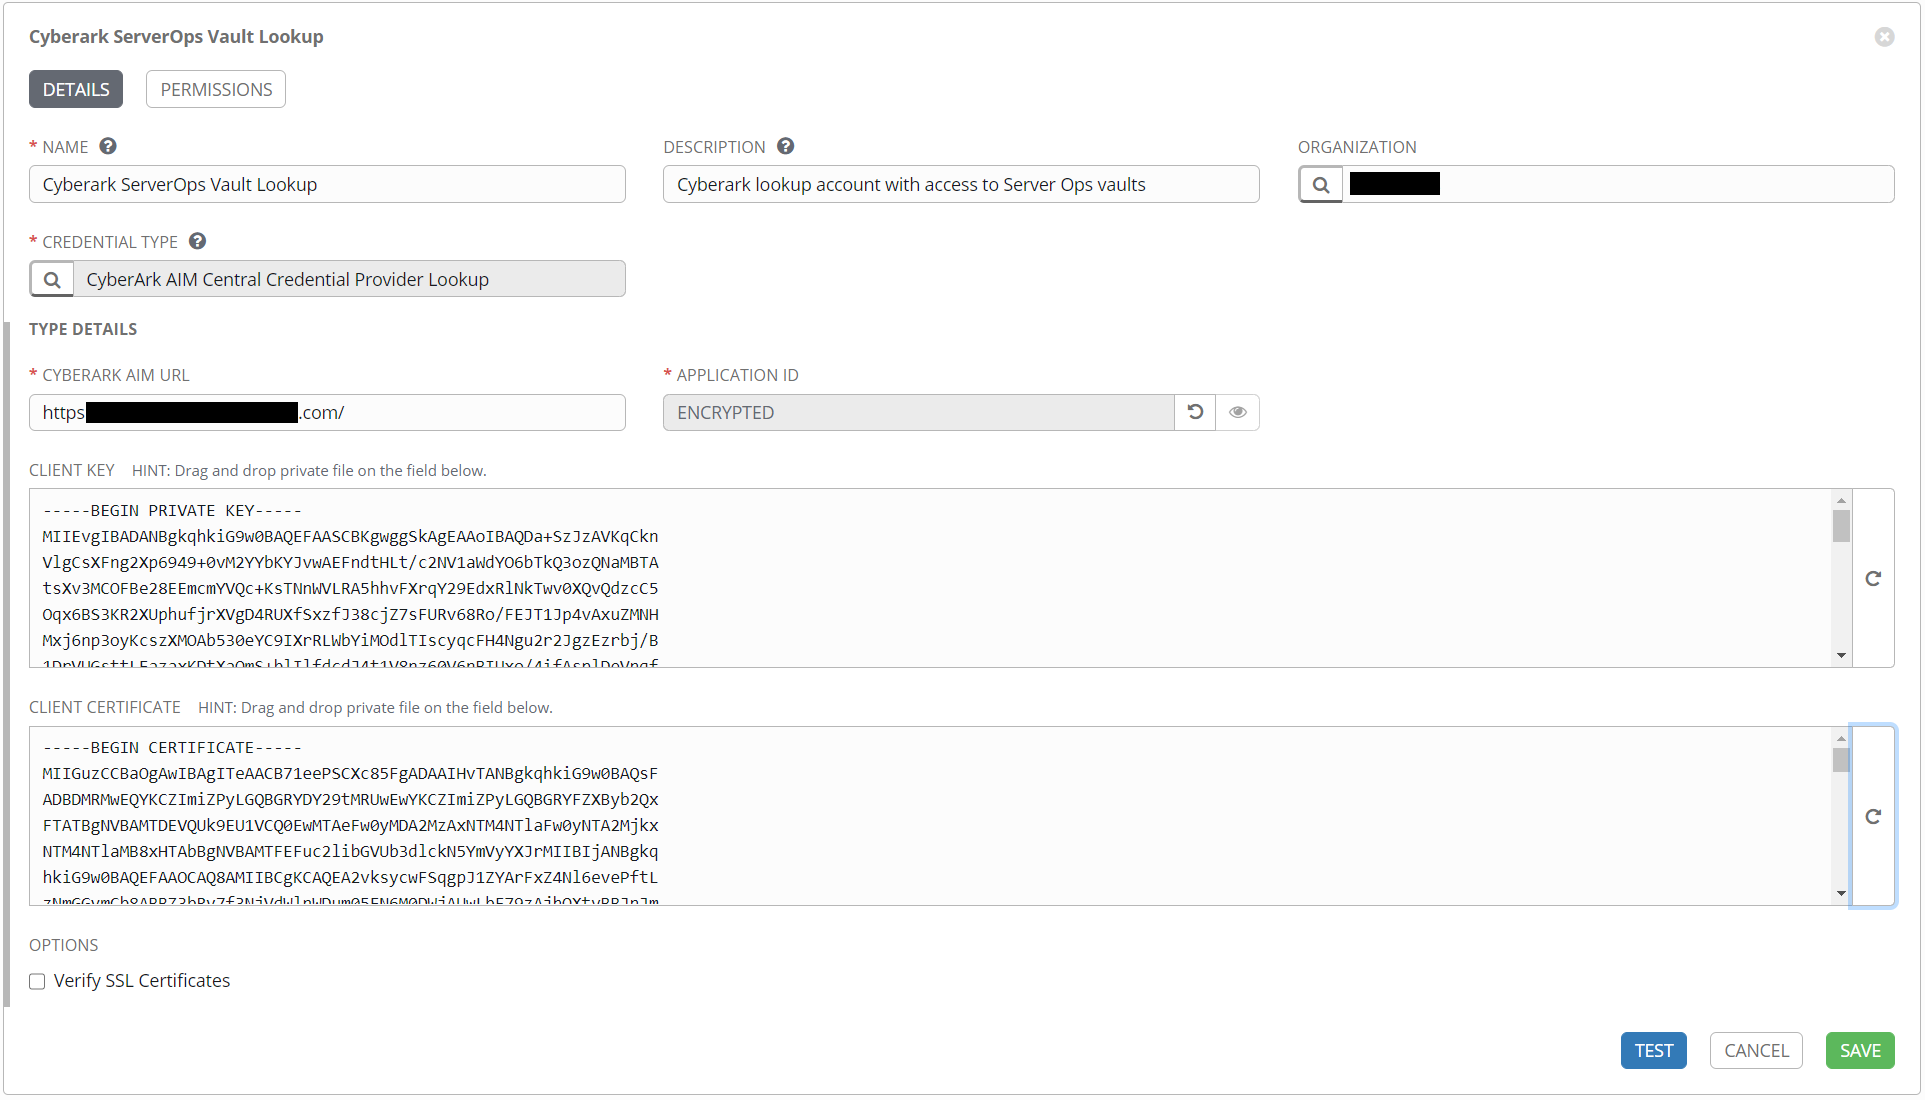
Be sure to click the SAVE button before leaving this screen. If you haven’t already, send the serial number of this certificate to your CyberArk administrator. This will need to be in place before any lookups will work.
NOTE: the TEST button does not currently work, and will give an error even when the data is correct, unless you are logged in to Tower with the default admin account.
Using the CyberArk Credential Lookup
Now that the lookup credential is configured, other credentials can be updated to use the lookup when a password is needed. The most common type of credential in Tower is the machine credential, but all types are supported. A machine credential is used to connect to machines in an inventory when running a playbook. The following example will show how to create a new machine credential object and configure it for CyberArk password lookup.
Navigate to the credentials section of Tower, and click on the + sign to create a new credential. Give the credential a recognizable name, and select Machine from the CREDENTIAL TYPE field.
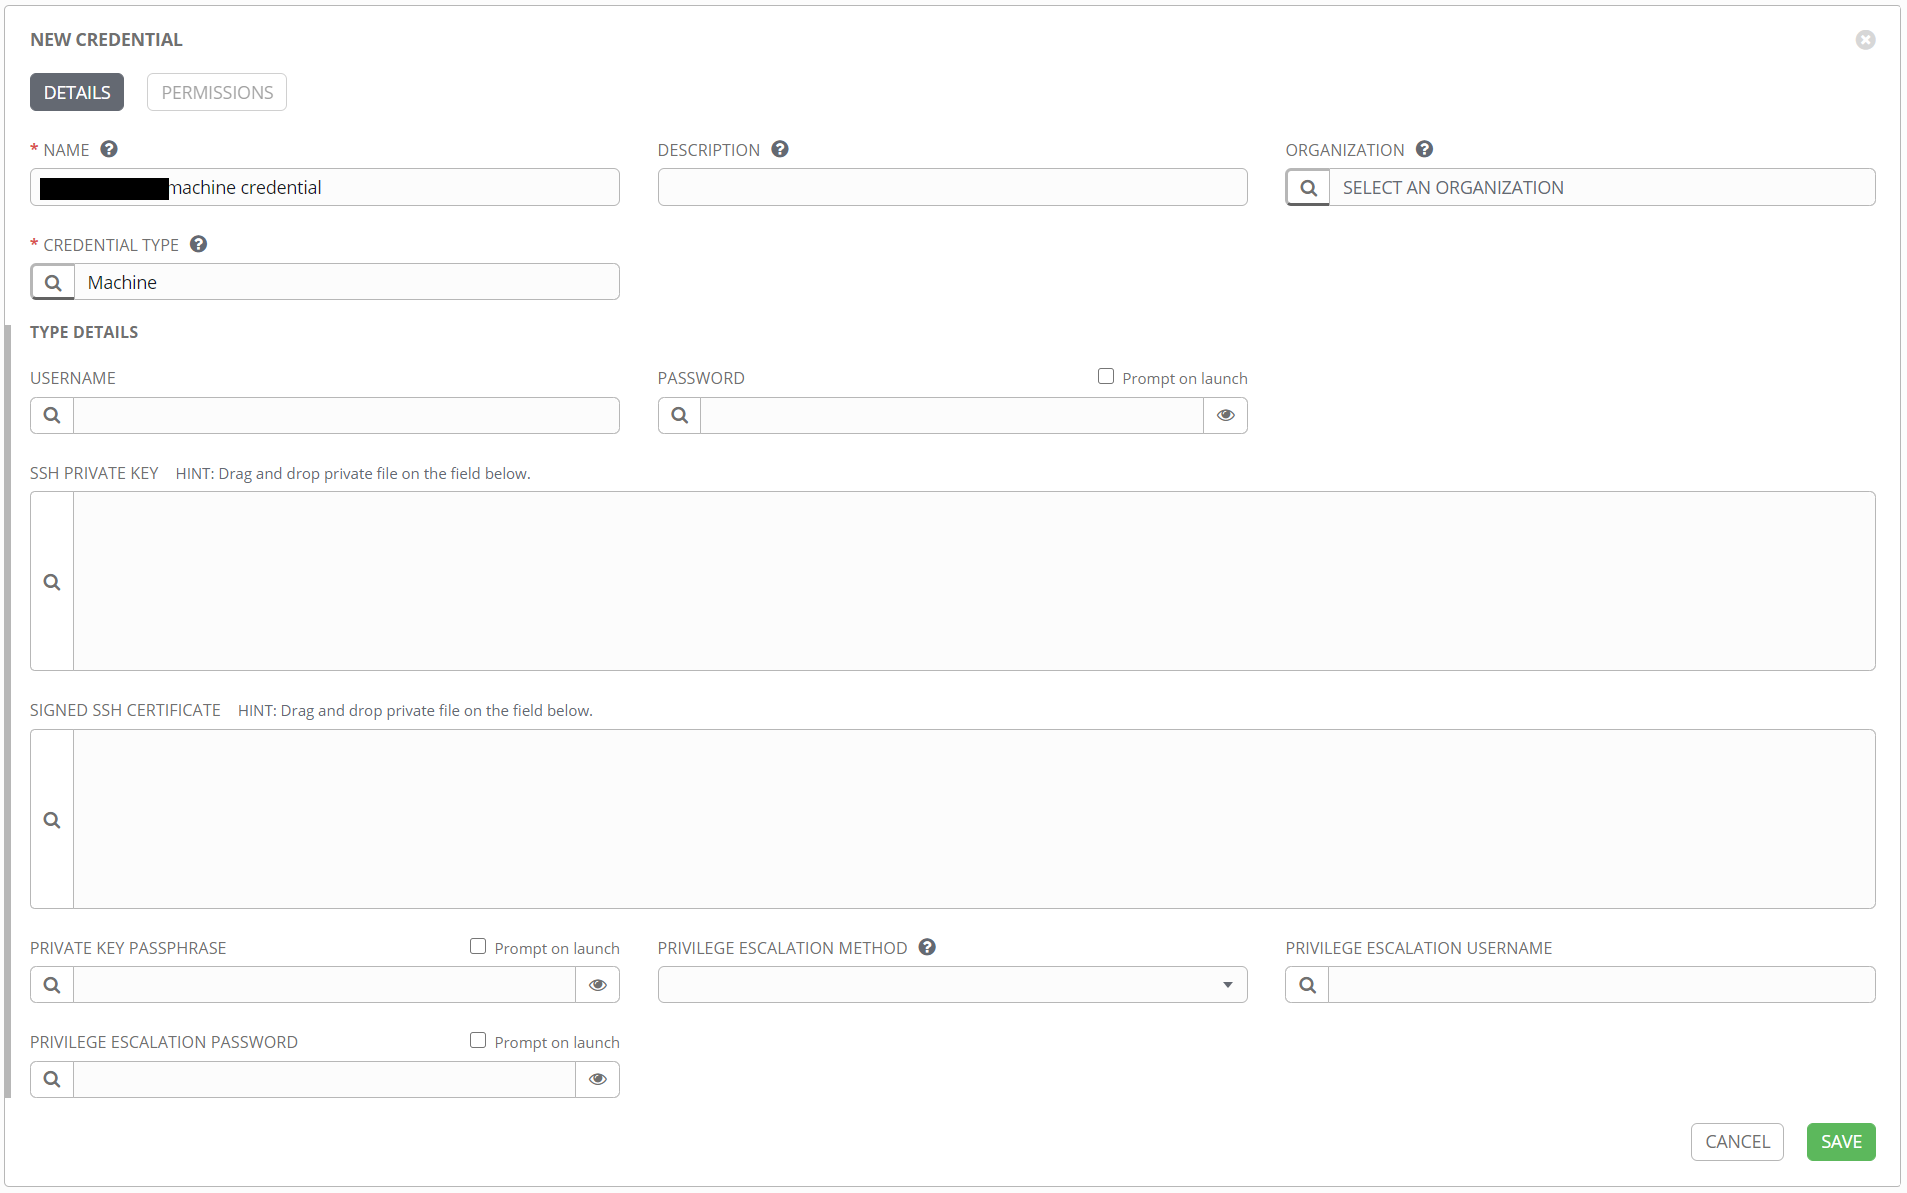
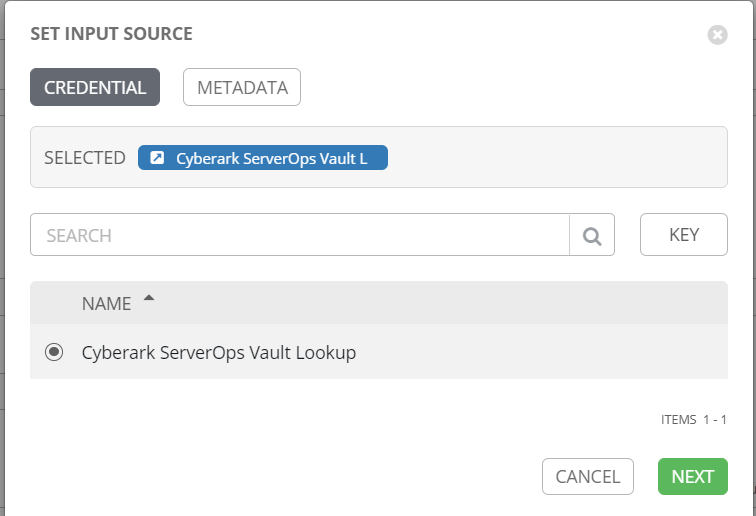
the USERNAME field should be the fully qualified name of the account. If the account is an Active Directory account, the domain portion should be upper case, i.e. admin@DOMAIN.COM rather than admin@domain.com. For the account password, rather than entering it directly, click on the magnifying glass button to bring up the details pane. You should see the CyberArk credential object created previously. Select the object and click NEXT.
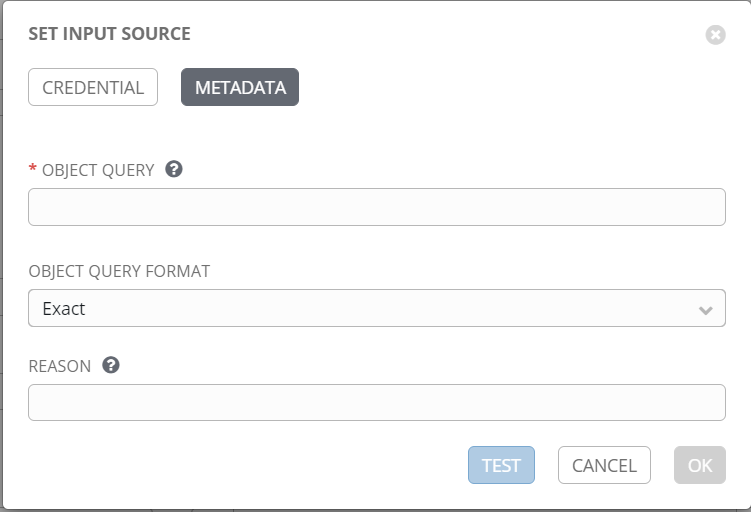
This next screen is where you define which account the password should be retrieved for. The OBJECT QUERY field can take a few different formats, but is generally a semi-colon separated list of key-value pairs. It should include the vault name, and either the object name, or the username and address pair.
Examples:
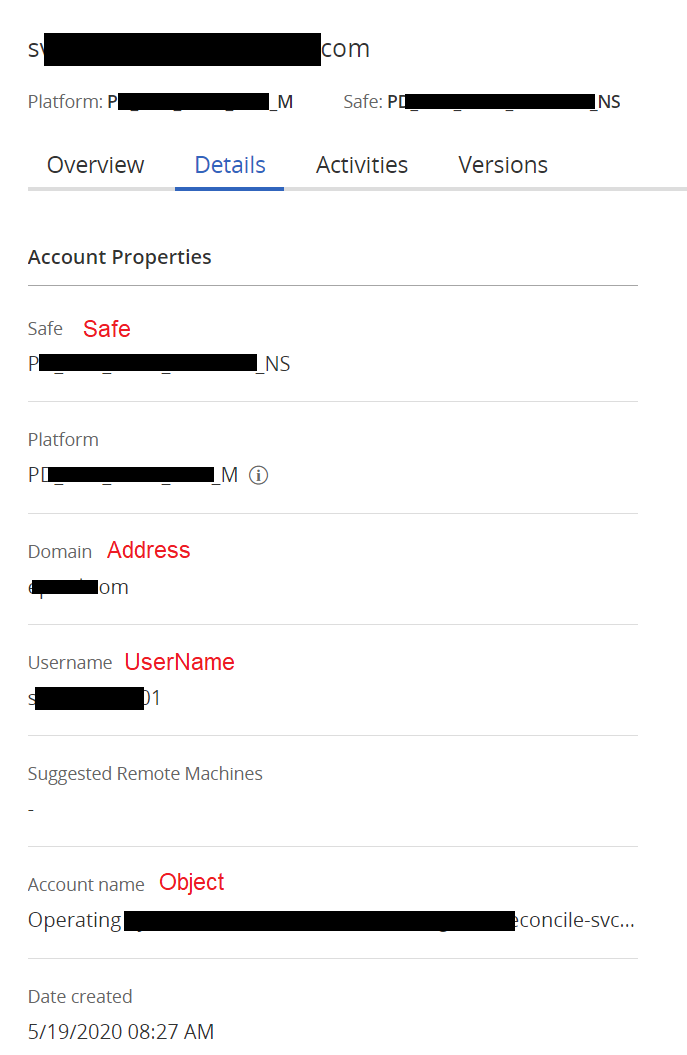
Safe=YOUR_SAFE_NAME;UserName=admin;Address=domain.com

--or--

Safe=YOUR_SAFE_NAME;Object=Operating System-DOMAIN-ManualChangeandReconcile-admin@domain.com
The above data can be retrieved from the CyberArk web interface, when looking at an account details page.
Once the OBJECT QUERY field is populated, click the OK button to save the form. The OBJECT QUERY FORMAT and REASON field do not need to be modified.
The PASSWORD field should now have a CyberArk credential object reference. 
Depending on use case, the PRIVILEGE ESCALATION USERNAME and PRIVILEGE ESCALATION PASSWORD fields may be filled out in the same manner. If used, the PRIVILEGED ESCALATION METHOD for a Windows account should be runas. The certificate fields do not typically apply to Windows accounts.
Click on the Save button before leaving this screen. At this point the credential object is ready for use. It can be attached to a template and used for running playbooks. The password checkout query will be performed at runtime, without any user intervention required.
Conclusion
And that’s all the magic behind the curtain! Hopefully this was a relatively easy process to follow, and you were able to follow along in your environment. One of the great things about this is the ease of reconfiguring accounts, mostly due to the modularity of Tower credentials. In the demo here we created a new credential object, but if you are retrofitting this feature into an existing Tower environment, you can also edit existing credentials and replace the static passwords with lookup fields. In this scenario, no other changes are needed! No changes to templates that use the credentials, no changes to any permissions assigned to the credentials, everything besides the password field remains the same. Also, if you’re retrofitting this feature into an existing environment, the most exciting time will be at your next password change interval. Simply force a change in CyberArk or allow it to rotate on a schedule, and that’s it! No more editing credential objects or re-applying passwords! Unless, of course, you’ve used those passwords outside of Tower and have to chase those down, but that’s a problem for another day.